
Table of Contents
- Gather Your Supplies for a Crochet Wall Organizer
- How to Stiffen Crochet Wall Pockets for Structure
- Easy Steps to Make Your First Crochet Wall Organizer
- Choosing the Best Yarn for Home Decor Projects
- Frequently Asked Questions
Last Updated: September 5, 2026
A crochet wall organizer adds vertical storage to any room while showing off your handmade style. This BlockToGo guide walks you through making your first one, from supplies to hanging.
The best part? This project is genuinely beginner-friendly. It uses simple stitches, works up quickly, and solves a real problem: where to keep your hooks, yarn tools, or mail without cluttering your space. Many crafters have discovered that a crochet wall organizer is one of the most satisfying projects to finish because it transforms scrap yarn into something useful. As one maker shared on the r/crochet community, turning leftover yarn into a wall-hanging organizer for supplies brought real satisfaction and a fresh purpose for materials that would otherwise sit unused.
Below, we'll cover supplies, how to stiffen pockets so they hold their shape, and simple steps to create your own.
Gather Your Supplies for a Crochet Wall Organizer
A crochet wall organizer is a fabric panel with stitched-on pockets that hangs from a dowel or rod, giving you vertical storage for small items. Before you begin, collect these basics:
- Cotton yarn in your favorite colors
- Crochet hook (4 mm works well for most cotton yarns)
- Yarn needle or tapestry needle for finishing
- Scissors
- Wooden dowel or hanging stick for the top edge
- Stitch markers to track your rows
Cotton yarn is the go-to choice here. It holds its shape better than acrylic and gives your organizer that crisp, structured look. Recent DIY guides for wall organizers consistently recommend cotton yarn paired with a 4 mm hook and a wooden dowel for support, as seen in 2026 crochet wall organizer tutorials. A common mistake is grabbing whatever yarn you have on hand, but fiber content really matters for a project that needs to stand up straight.
How to Stiffen Crochet Wall Pockets for Structure
The most common issue is floppy pockets that sag under weight. Your yarn choice and stitch tension do most of the work.
Tight, consistent tension creates a denser fabric that holds its shape. If pockets still feel soft, line the back with fabric or wet-block your organizer and let it dry flat.
You can also crochet a single crochet border around the top edge and insert your dowel through it for a stable hanging point. For pockets, try a double-thickness front flap or a cord through the top for extra support.
Easy Steps to Make Your First Crochet Wall Organizer
Now for the fun part. Follow these steps to create your own crochet wall organizer:
Step 1: Chain your foundation. Chain until you reach your desired width, about 30 chains for a narrow organizer, or 50 for a wider one. Measure against your wall space first.
Step 2: Work your base panel. Single crochet in each chain across, then continue working rows until your panel reaches the desired height. Keep your tension even and count your stitches each row.
Step 3: Add the pockets. Mark pocket spots with stitch markers, then work a separate rectangle and sew it onto the base panel along the sides and bottom, leaving the top open.
Shop Crochet Patterns & Kits →
Step 4: Create the hanging channel. Fold the top edge of your panel over your wooden dowel and stitch it down, creating a sleeve for the dowel to slide through.
Step 5: Finish and hang. Weave in all loose ends with your yarn needle, slide the dowel through the channel, and mount your organizer on the wall.
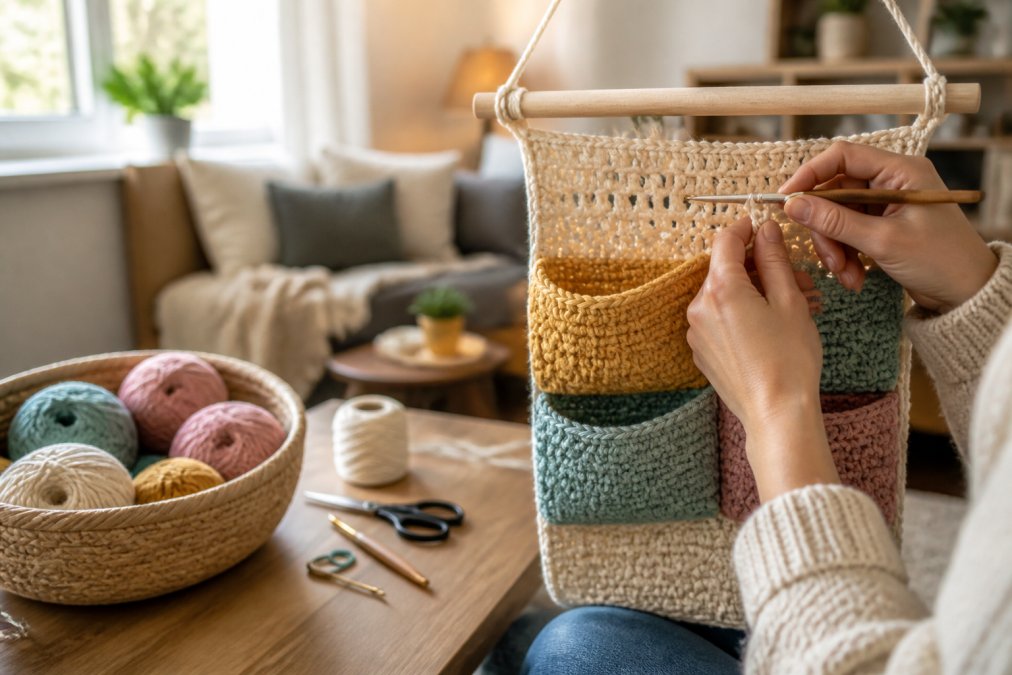
Following a clear pattern, like those from BlockToGo, gives you stitch counts and row-by-row instructions so you can focus on enjoying the craft.
Choosing the Best Yarn for Home Decor Projects
Choosing yarn for home decor comes down to fiber content, weight, and washability.
Fiber content matters most. Cotton is the clear winner because it's sturdy and doesn't stretch. Acrylic tends to sag, and wool is heavier and needs careful washing. Recycled cotton or bamboo blends are worth considering for sustainability.
Weight affects the final look. Worsted weight is the sweet spot for beginners, quick to work up but polished. Bulky yarns may overwhelm a small wall, and fingering weight takes much longer.
Washability is practical. Wall organizers collect dust, so gentle hand-washing and reshaping is a real benefit. Cotton handles this beautifully.
The growing interest in beginner-friendly, functional home decor patterns reflects a broader shift: crafters want projects that are both beautiful and genuinely useful. As pattern designers and DIY bloggers continue publishing new wall organizer guides and video tutorials, the options for customization keep growing.
Making your own crochet wall organizer combines creativity with practical storage. The key is choosing the right yarn, keeping tension consistent, and following a clear pattern. Visit the BlockToGo shop to find your next project and start creating something you'll be proud to hang.
Frequently Asked Questions
What is the best yarn for a sturdy crochet wall organizer?
Cotton yarn is the best choice for a crochet wall organizer because it is strong, holds its shape well, and has less stretch than acrylic yarn. A worsted weight cotton yarn creates a durable fabric that can hold small items without sagging. Look for a yarn that feels firm but is still comfortable to work with, ensuring your organizer remains functional and beautiful for years.
How do I keep my crochet wall organizer from sagging?
To prevent sagging, use a wooden dowel or hanging stick inserted through the top edge for support. You can also stiffen the finished fabric with a fabric stiffener or a mixture of glue and water to help the pockets hold their shape. Choosing a tight stitch pattern and cotton yarn also adds structural integrity, keeping your organizer looking neat.
What are some beginner crochet storage ideas for small spaces?
A crochet wall organizer is a fantastic beginner project for small spaces because it uses vertical wall space. You can create simple pocket designs to store glasses, mail, or craft supplies. Other easy ideas include crocheting a small basket for odds and ends or a hanging holder for keys near the door. These projects are quick, useful, and require minimal materials.